As I noted in the basement unfinishing story, the basement has moisture problems. I was curious to find out if there was any sort of drainage around the perimeter of the house, so I started digging down along the foundation. This turned out to be rather difficult. While it looks like the house is surrounded by gravel, I found that this is only the surface. The gravel quickly give way for lava rocks. This made it quite a pain in the ass to dig, but after some amount of digging and lifting foot-sized rocks, I made it down to the foundation footer. No drainage.
Now, how one can build an underground foundation in the rainiest town in the U.S without putting in a drainage system is beyond me. Maybe they didn’t know about drainage in the fifties? The house I grew up in has several French drains going around the perimeter of the house, and even today, almost 40 years after the house was built, there’s a constant trickle of water draining out of this system. I guess I figured this was something you normally did when building a house, but apparently not.
Anyway. One thing everyone says you should check if you have basement moisture problems is that the downspouts from the roof don’t discharge water near the perimeter of the house. There is a downspout coming down right at the corner where that basement room is, and while there was a pipe taking the water all the way to the property line, I wasn’t convinced this actually worked well. This is what the area looks like:
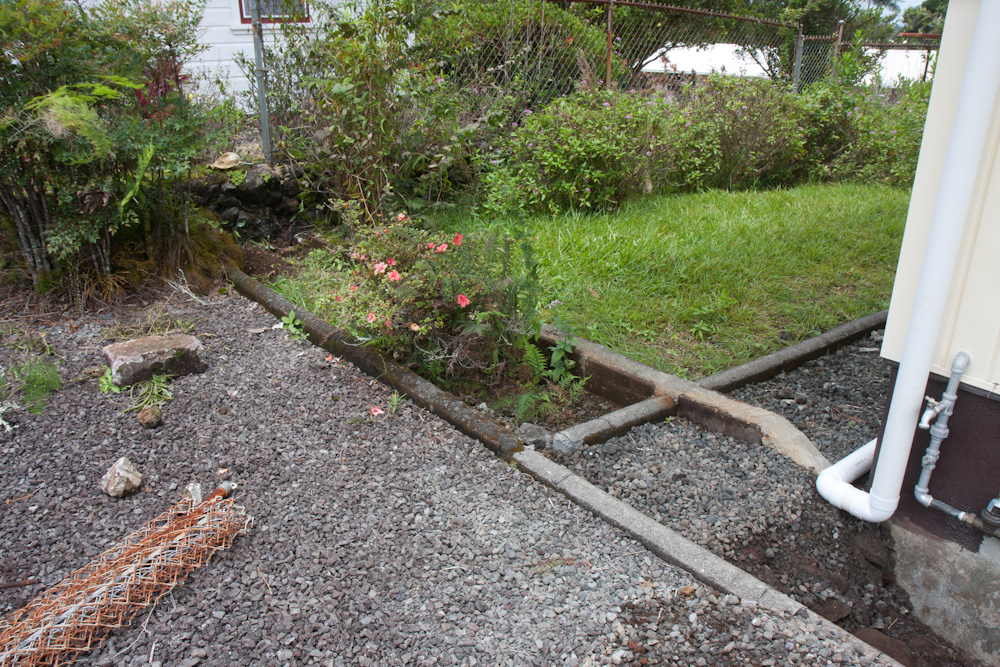
The downspout used to route in between the two walls over to the lava wall by the property line.
I didn’t take any pictures of the pre-existing setup, but the downspout went in between the two concrete/stone walls, past the red flowers, and terminated by the lava wall on the property line in the upper left. While this led the water as far away from the house as possible in that direction, the water didn’t really have anywhere to go. It was discharged between those two walls and, if anything, that area slopes back towards the house. During heavy rainfall, I’d noticed that the entire area in between those walls turned into a pool of standing water.
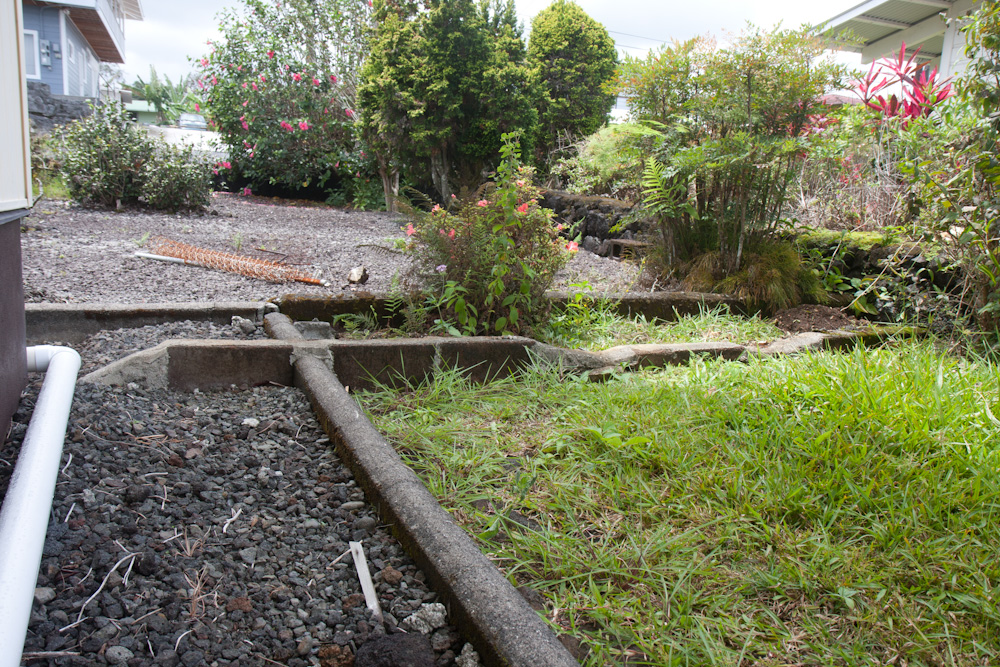
This picture kind of shows how the ground actually slopes back towards the house in this area. Not exactly how it’s supposed to be.
It’s hard to see in the picture above, but the lawn is quite a bit sloped towards the house here. As a consequence, the water pooling up between those two walls probably took the path of least resistance, which I suspect is towards the gravel bed around the perimeter. The lawn in the corner nearest the house, in the center of the picture above, looked like it got too wet, and the inside walls of the basement room look like the most moisture is about where that water would end up.
So I decided to improve the drainage. First I was going to keep the existing pipe and just extend it down the property line (to the right in the first picture). I got so far as to hack away the stone in the wall so the pipe could go through when I realized that to get proper slope on the drain I’d have to dig a trench right through the bushes next to the property line. This seemed like a lot of work.
Instead, I decided to just test how much difference it would make by re-routing the pipe down the side of the house all the way down to the lowest corner of the yard.
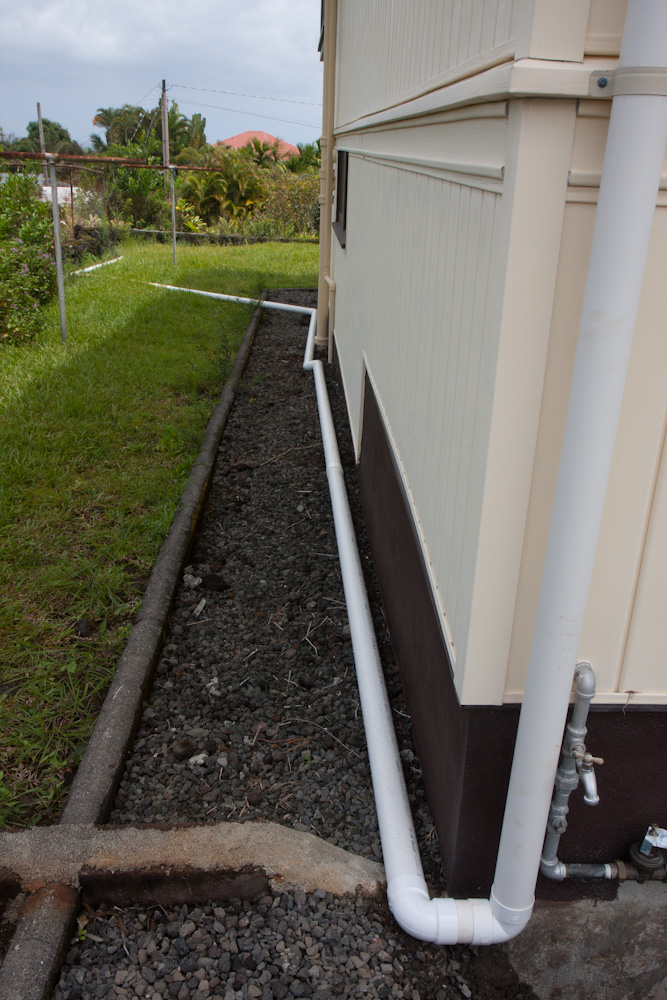
The new routing takes the drain all the way down the side of the house, across the lawn, and out to the property line.
This is sort of suboptimal in that it takes the pipe across the lawn. Not that we do anything on the lawn anyway, but for a more permanent installation we’d probably want to route it underground. This way we can at least see if it makes a difference to the amount of moisture in the basement. We’ll see in a week or two if anything’s changed, I guess.
While I was working with all that PVC pipe, I also discovered that it fits almost perfectly on the outside of the broken metal downspout on the lanai. The top part of the pipe that goes out and connects to the gutter has been missing since we moved in. When it rains, the water instead falls the 16 feet or so down on the rocks below, splashing water everywhere and making quite the noise. We’d tried to find a replacement pipe, but none of the home improvement carry metal pipe any longer. These days it’s all plastic. However, the PVC pipe just about slid on the outside of it.
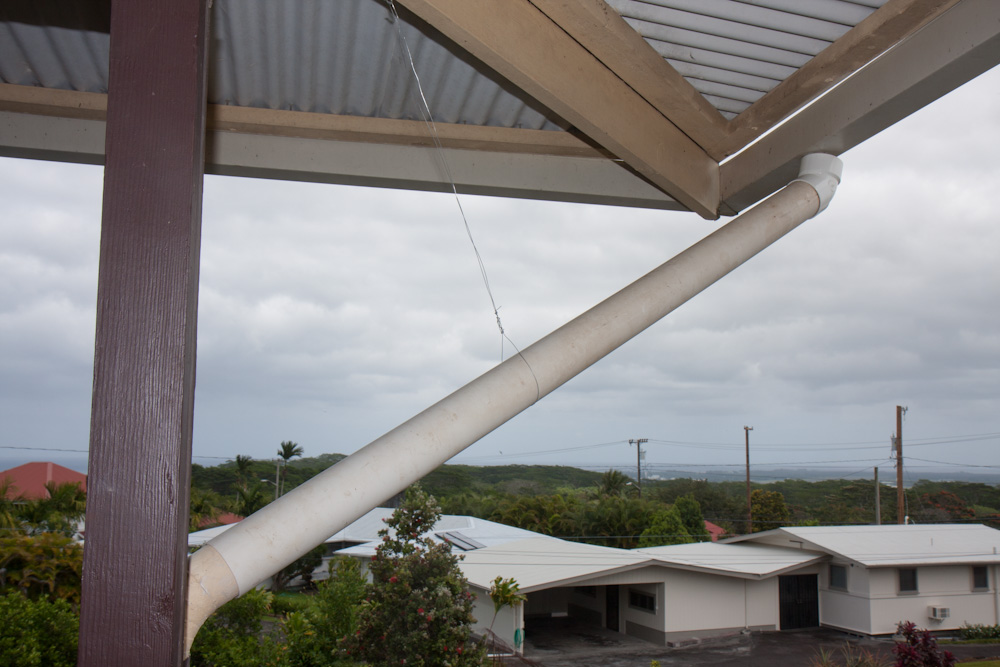
This part of the metal downspout was missing, sending the water falling 14 feet down on the rocks below. The PVC drain pipe fit around it.
There are two small problems with this arrangement. The obvious one is that the pipe fits around the outside of the downspout, and you really want it on the inside. A generous helping of gutter sealant when sliding it on seems to have sealed it up, though. The second problem is that normally you attach the downspout to the gutter. Here, that would require either a 14-foot ladder or hanging down from the roof above. None of those options seemed really appealing, so instead I just hung it from the beam above with some steel wire. A bit ghetto, but it works. If it ever breaks, we’ll revert to the original plan which was to just replace the entire downspout with a plastic one. But that will still require fastening it to the gutter…
Pingback: Drainage improvements #2 – a whole lotta’ digging | Patrik's projects